Unit-testing C code with Ceedling and CMock

At Zaleos, one of our projects consists of an ESRP, which has been implemented as a module for the Kamailio SIP Router (https://www.kamailio.org/). All of our code for this project is written in C, and comes in at around 27k lines of code.
ESRP - Emergency Service Routing Protocol.
Where our problems began...
Up until recently, we only used Unity for our unit tests, but we started running into various problems: there is no mocking out of the box, making the testing of code that depends directly on Kamailio code difficult. We also had the same problem with code that depends on other low-level libraries such as cAres. Another thing that we missed was code coverage reports. All this can be solved by introducing Ceedling into the scene.
What is Ceedling
Ceedling is a build framework for the C programming language. It is targeted at test driven development (TDD) in C. It works together with CMock, Unity and CException to get things working.
http://www.throwtheswitch.org/ceedling
We will demonstrate CMock and Unity in this blog post, because we have not had the pleasure to use CException in our code yet.
CMock
CMock is a library to help testing C code files: it allows mocking functions in an easy fashion. Although CMock can be used without Ceedling, it makes it easier if it is used with the framework.
All you have to do to use CMock, is add a mock header file to the test suite file, and then add expectations / stubs inside the tests.
Here is a simple example:
In this simple header file, we declare a function that returns an int:
// adder.h:
#ifndef BASIC_ADDER_H
#define BASIC_ADDER_H

int doAddOnePlusTwo();

#endif // BASIC_ADDER_H
In this test suite, we mock the adder.h file (by using #include "mock_adder.h"), and then add an expectation for the mocked function:
The following line makes the test expect to be called, and specifies the mock to return the value 9.
doAddOnePlusTwo_ExpectAndReturn(9);// test_adder_mock.c:
#include "unity.h"
#include "mock_adder.h"
void setUp() {}
void tearDown() {}
void test_doAddOnePlusTwo() {
doAddOnePlusTwo_ExpectAndReturn(9);
int result = doAddOnePlusTwo();
TEST_ASSERT_EQUAL_INT(9, result);
}Even though we have mocked this header file directly, we could have mocked a header file included by adder.h (or adder.c), or any header file included in the dependency hierarchy (In the examples later, we do exactly this).
Example Project
We’re going to walk you through setting up a project that uses Ceedling as the testing framework. You can grab the code from:
https://github.com/zaleos/post-ceedling-demo.git
If you want to follow along with the repo, it’s easiest to use Docker (if you don’t know how to use Docker, I highly recommend you head over to https://docs.docker.com/get-started/ for some container greatness). If not, you can check out the Dockerfile that’s in the repo for indications to prepare your test environment.
Basic example
First, the testing environment:
# Clone the repository:
$ git clone https://github.com/zaleos/post-ceedling-demo.git
$ cd post-ceedling-demo
# Create the docker image:
$ docker build -t zaleos-ubuntu .
# Now, create and run a container based on this image:
$ docker run --rm -ti -v $(pwd):/root/basic-ceedling-example zaleos-ubuntu
# Let's make sure Ceedling is preinstalled in the container:
$ ceedling version
Welcome to Ceedling!
  Ceedling::   0.28.5-zaleos
  CMock::      2.4.6
  Unity::      2.4.4
  CException:: 1.3.1
(Note that the version numbers may vary. We use the -zaleos suffix to mark our fork of Ceedling.)
Now, we can run the test code from the repository:
$ git branch -a # Check out available branches
$ git checkout step1_skeleton_example
If you inspect the contents of the repository at this stage, you will find the basic layout of a Ceedling project (plus a few files we added):
.
|-- Dockerfile     -> This is to make the build environment in Docker
|-- Makefile       -> A simple Makefile we added
|-- README.md      -> Ceedling doesn't add this file, we added it ourselves
|-- project.yml    -> The Ceedling configuration for this project
|-- src            -> Where the source code is kept
|   |-- a.c
|   `-- a.h
`-- test           -> The folder for the test suites
    |-- support    -> Where the test helper files are kept
    `-- test_a.c
For this first example, we’re going to add a simple function which just prints to stdout, and returns 99:
// a.c:

#include "a.h"
#include "stdio.h"

int a() {
    printf("Running a()\n");
    return 99;
}
And now, we add the test suite for this file, which will make sure that this function returns 99 when it is called:
// test_a.c:

#include <unity.h>
#include "a.h"

void setUp() {}
void tearDown() {}

void test_a(void) {
    int result = a();
    TEST_ASSERT_EQUAL(99, result);
}
Now, let’s run the unit tests:
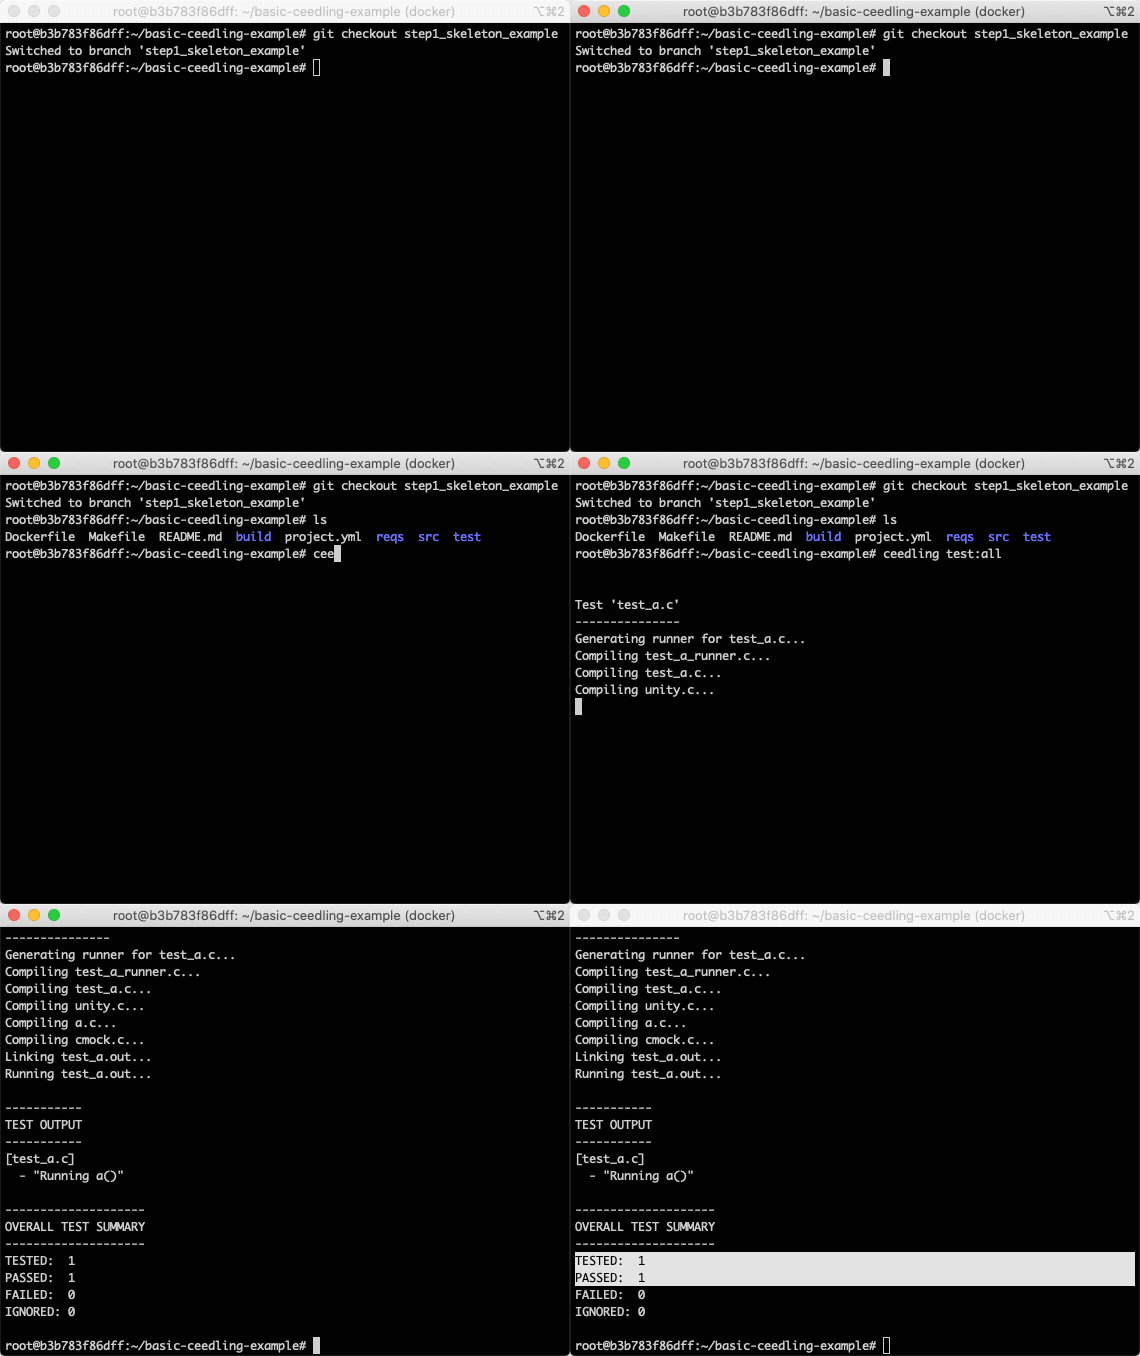
(Note that test:all is the default that's set up in project.yml, so in this case it could be omitted.)
External libraries
One thing you might have to use in your code is external libraries. For this example, we are going to build an external library, and link it in to our code.
We are going to create a math library, with a function that adds the two parameters it receives and returns the result:
int add(int a, int b);Here is the source file:
// my_math.c:

#include "my_math.h"

int add(int a, int b) {
	return a + b;
}
Now, we will add a .c file that uses this external library to calculate 1+2:
// adder.c:

#include "adder.h"
#include "my_math.h"

int doAddOnePlusTwo() {
	return add(1, 2);
}
The test suite to test this file would look something like this:
// test_adder.c:

#include <unity.h>

#include "adder.h"

void setUp() {}
void tearDown() {}

void test_doAddOnePlusTwo() {
	int result = doAddOnePlusTwo();
	TEST_ASSERT_EQUAL(3, result);
}
We are also going to create folders to contain the external libraries, in reqs/lib for the .so files, and reqs/include for the .h header files.
We must also add the external library header directory and the external .so library to the project.yml:
# step2_project.yml:

:paths:
  :include:
    - reqs/include/**
  ...

:libraries:
  :placement: :end
  :flag: "${1}"
  :common: []
  :test:
    - reqs/lib/libmy_math.so # This is the name of the .so (Shared Object) library we are going to use
  ...
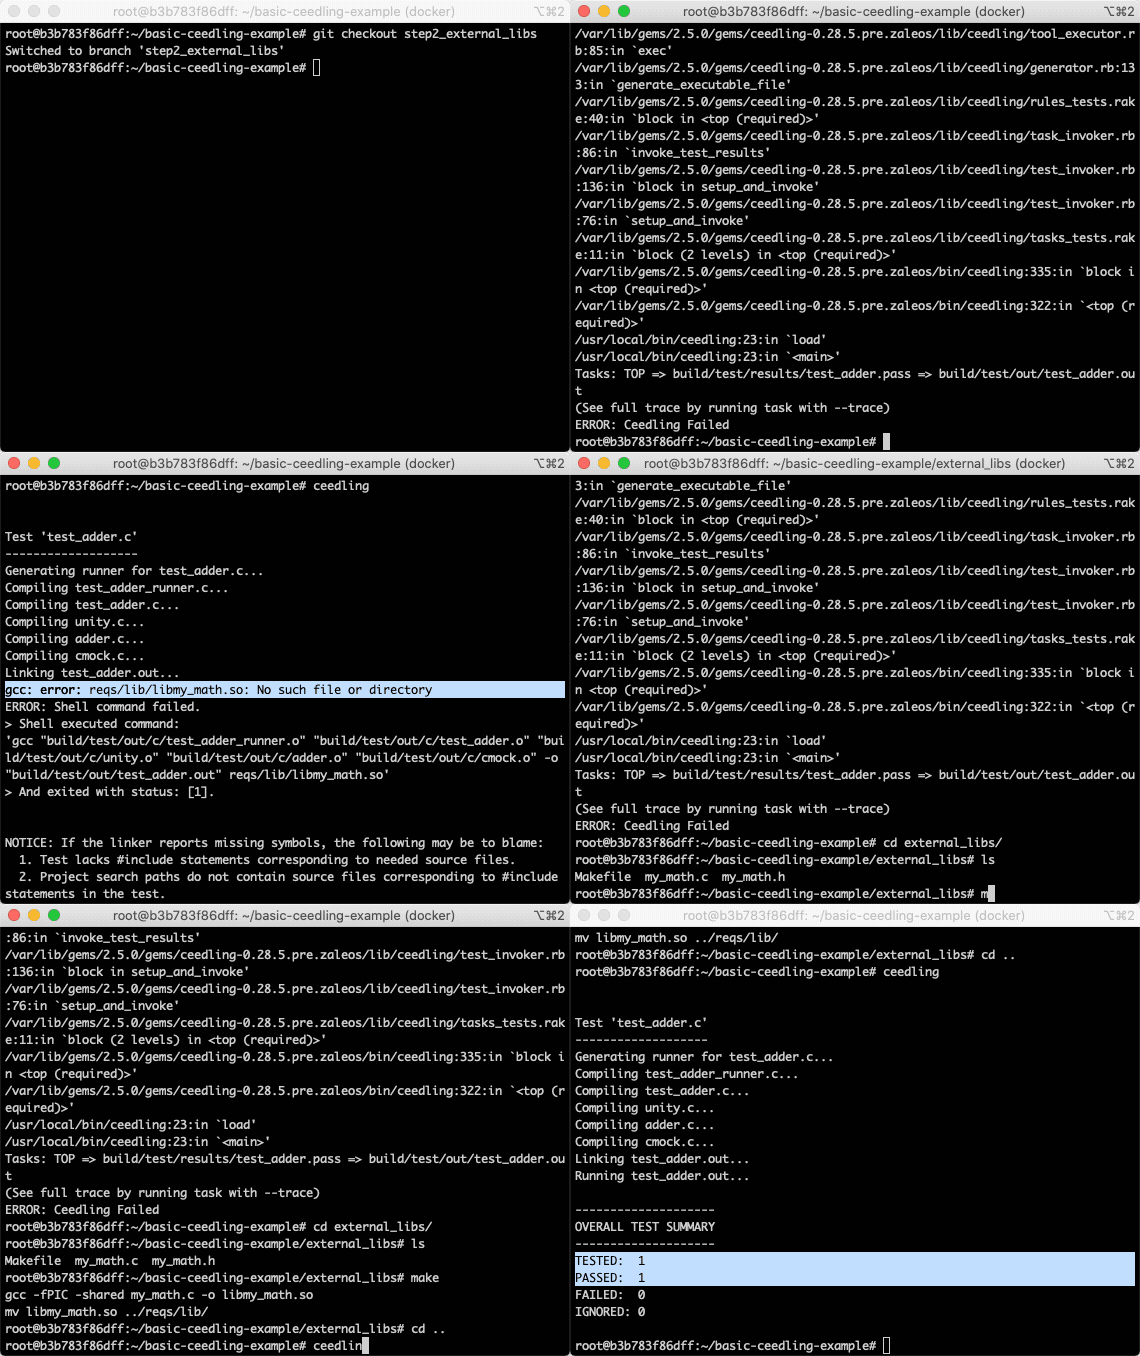
If we check out the branch for step 2, and run Ceedling, we should receive an error, because the “external” library hasn’t been compiled yet.
$ git checkout step2_external_libs
$ ceedling test:adder

...
gcc: error: reqs/lib/libmy_math.so: No such file or directory
...
To build the external library, and copy the .so file into the directory that we have configured previously in project.yml, a Makefile has been provided in the external_libs folder:
$ cd external_libs/
$ make
gcc -fPIC -shared my_math.c -o libmy_math.so
mv libmy_math.so ../reqs/lib/
$ cd ..
Now, Ceedling should run correctly:
Support files
Sometimes, you may wish to add auxiliary code to help with the unit testing, but you don’t want to include this code in the source code for the final binary. For this, we use support files. In this example, we are going to work with an implementation for 2D Vector addition.
The .c file is a little long here (you can check out the src/vectors.c file from the step3_support_files branch to see the code, if you wish), but here is the include file, to get an idea of the functions we will be working with:
// vectors.h

#ifndef VECTORS_H
#define VECTORS_H

struct Vector {
	int x;
	int y;
};

typedef struct Vector *vectorPtr;

// Initializes a vectorPtr area in memory with the x and y params
vectorPtr initVector(int x, int y);

// Clears the memory used by a vectorPtr
void destroyVector(vectorPtr *ptr);

// Sums two vectorPtr objects, and returns a new vectorPtr
vectorPtr sumVectors(const vectorPtr a, const vectorPtr b);

// Compares two vectorPtr objects, and return 0 if they are equal
int cmpVectors(const vectorPtr a, const vectorPtr b);

#endif // VECTORS_H
Say for example you would like to have a helper function that generates a vector from a string, to be used exclusively in the unit tests:
// strToVector parses a string separated by ; to a vectorPtr
// Example: vectorPtr vec = strToVector("123;456"); // x=123 y=456
vectorPtr strToVector(const char *str);
We will need to configure the paths section of the project.yml:
:paths:
  :test:
    - +:test/**
    - -:test/support # There are no test suites in this folder, so remove it
  :support:
    - test/support # This is where the support files go
Now we can use the support function we created earlier in our tests:
// test_vectors.c

void test_sumVectors() {
	vectorPtr vec1 = initVector(1, 2);
	vectorPtr vec2 = strToVector("3;4");
	TEST_ASSERT_NOT_NULL(vec1);
	TEST_ASSERT_NOT_NULL(vec2);
	vectorPtr sumVec = sumVectors(vec1, vec2);
	TEST_ASSERT_NOT_NULL(sumVec);
	TEST_ASSERT_EQUAL(4, sumVec->x);
	TEST_ASSERT_EQUAL(6, sumVec->y);
	destroyVector(&vec1);
	destroyVector(&vec2);
	destroyVector(&sumVec);
}
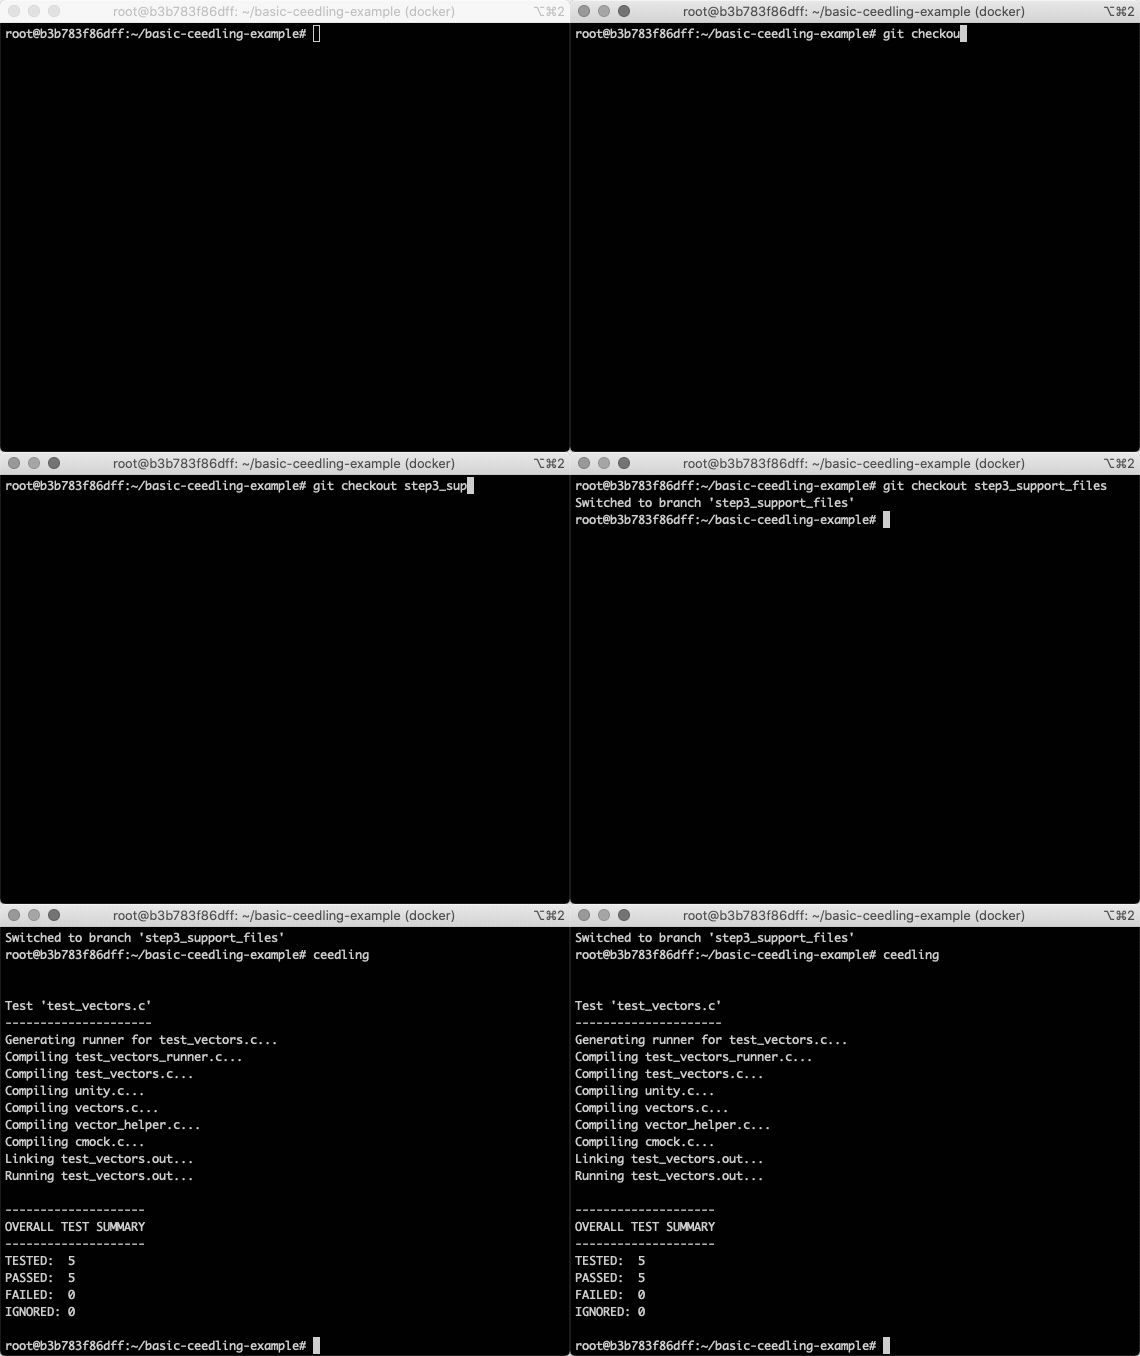
To see the source code, and run the unit tests:
$ git checkout step3_support_files
$ ceedling
Valgrind
Valgrind (as you probably know) is a memory leak tester for C. We can easily configure Ceedling to run Valgrind.
We will need to add the following to the project.yml:
:tools:
  :pre_test_fixture_execute:
    :executable: valgrind
    :arguments:
      - --track-origins=yes
      - --leak-check=full
      - --show-leak-kinds=all
      - --errors-for-leak-kinds=all
      - --error-exitcode=10
      - ${1}
:plugins:
  :enabled:
    - command_hooks
Now, when we run Ceedling, we should get Valgrind output also:
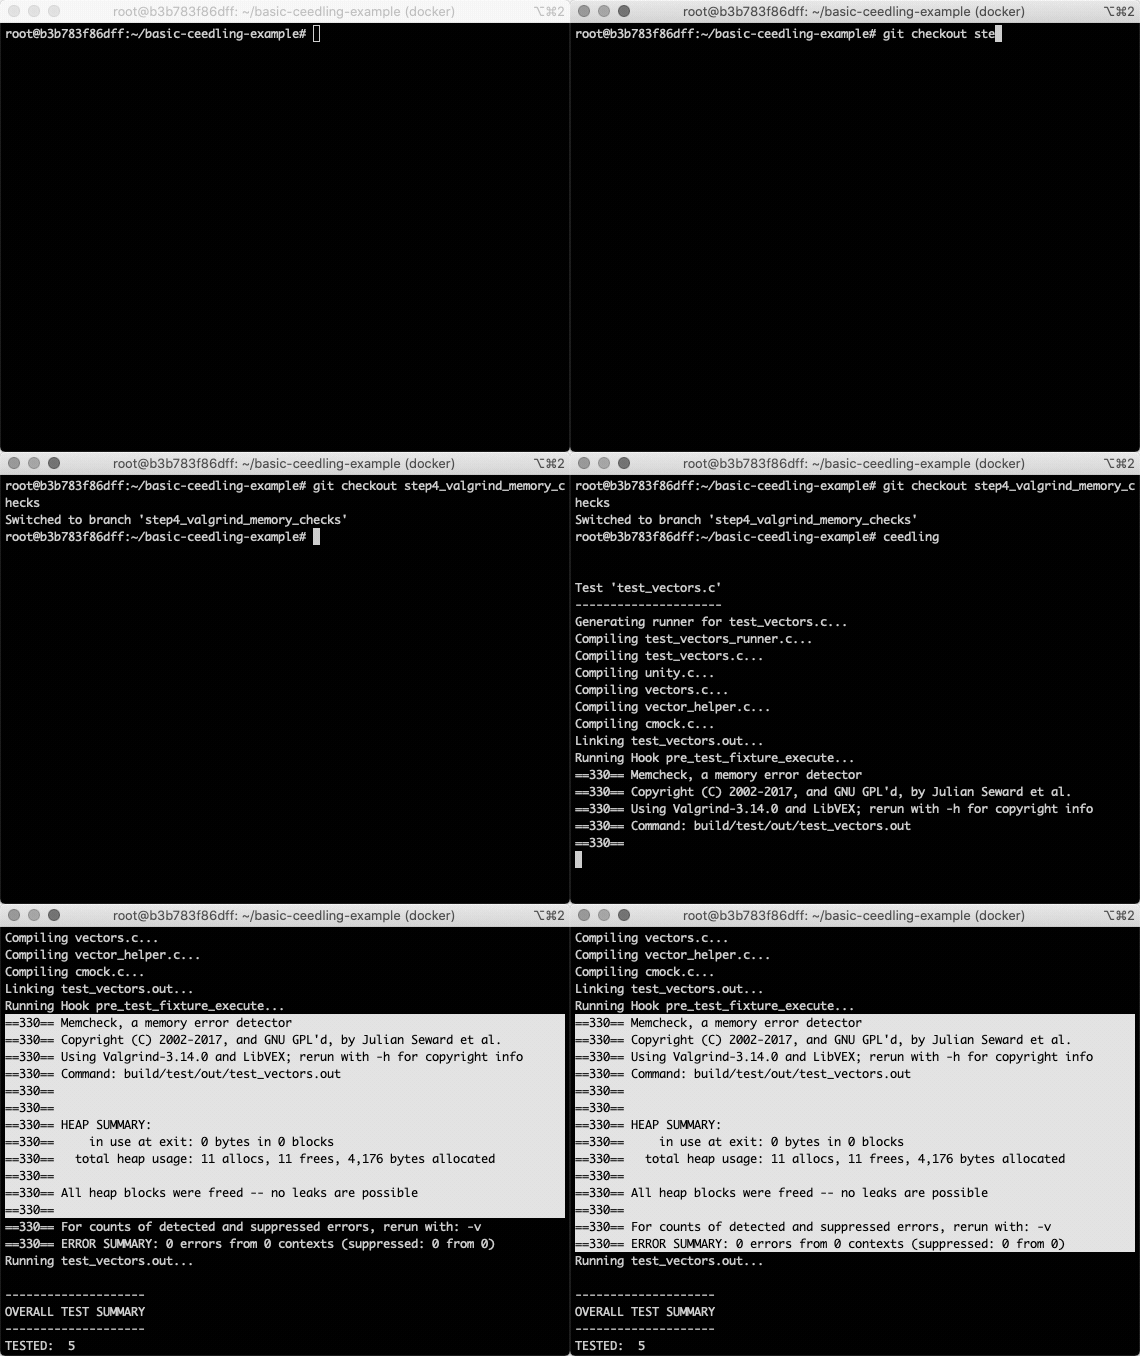
The code changes are available in the step4_valgrind_memory_checks branch:
$ git checkout step4_valgrind_memory_checks
To check what happens when Valgrind captures memory errors, you can comment the following line from test_vectors.c and run Ceedling again:
// destroyVector(&sumVec); // NOTE: Comment this line to check that Valgrind captures memory errors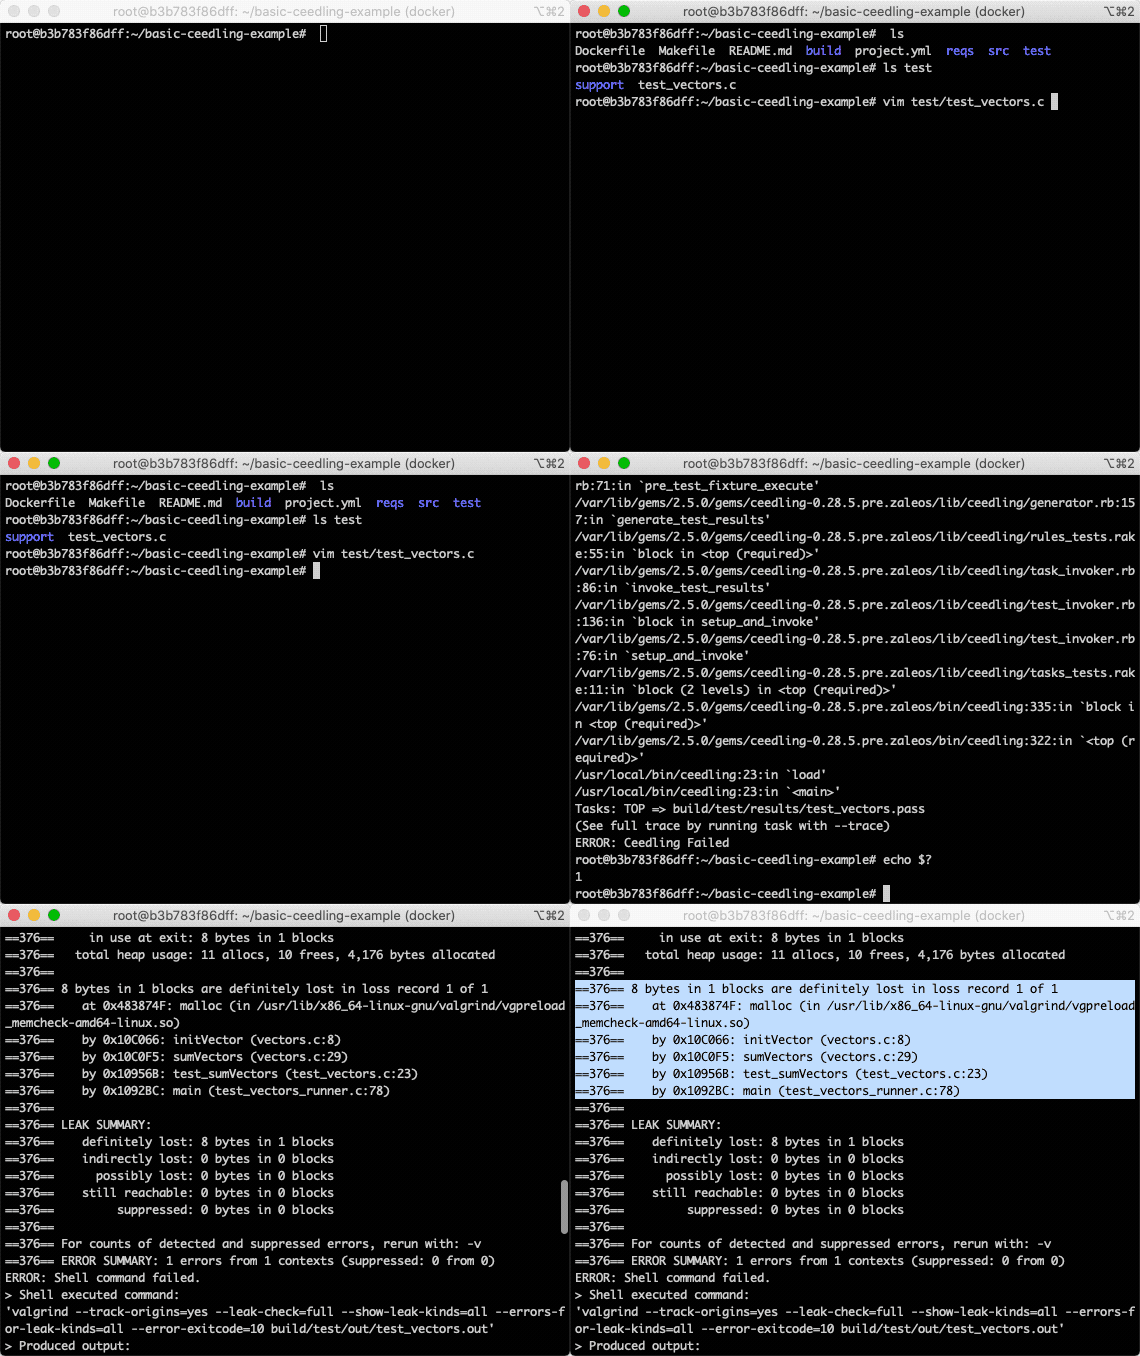
CMock
Now we’re going to dive into some mocking, another sweet feature of Ceedling.
We’re going to clone the test_adder.c test suite, and modify it a bit to mock the external libmy_math.so library.
$ copy test_adder.c to test_adder_with_mocks.c
Add the following line to the headers:
#include "mock_my_math.h"And we also need to add the expectations for any of the functions that are going to be called in the my_math lib:
add_ExpectAndReturn(1, 2, 9); // Expect add() to be called with add(1, 2), and return 9.Now, when we call the doAddOnePlusTwo() function, instead of returning 3, it is going to return 9 (because that is what we told the add() function to return when it is called):
int result = doAddOnePlusTwo(); // This calls add(1, 2), it will receive the value specified in the mock above
TEST_ASSERT_EQUAL_INT(9, result); // Make sure the function returned what it was supposed to
The code is in the step5_mocking branch:
$ git checkout step5_mocking
Deep linked dependencies:
A deep linked dependency is a where we have a test subject that has a dependency that has itself a different dependency.
For this example, we are going to add a function to convert HTTP URLs to HTTPS urls.
// urltest.h:
bool convertToHTTPS(char **url);

// convertToHTTPS acts as a wrapper for the function declared in urltestlib1.h:
bool http2HTTPS(char **url);

// The function in urltestlib1.h validates the url is valid by using the function declared in urltestlib2.h:
bool validateURL(const char *url);
As you can see, urltest has a dependency on urltestlib1, which itself has a dependency on urltestlib2:
In the test file, we must explicitly specify all of the .h dependencies:
// test_urls.c

#include <stdlib.h>

#include "unity.h"

#include "urltest.h"
// These two includes are required, otherwise we will get an error at linking time:
// ****************** //
#include "urltestlib1.h"
#include "urltestlib2.h"
// ****************** //

void setUp() {}
void tearDown() {}

void test_convertToHTTPS() {
	char *url = "http://some.domain.com/";

	bool err = convertToHTTPS(&url);
	TEST_ASSERT_FALSE(err);
	TEST_ASSERT_EQUAL_STRING("https://some.domain.com/", url);
	free(url);
}
(Note that if we have a very large codebase, we may end up adding many header files to the test suite. More on that in a little bit.)
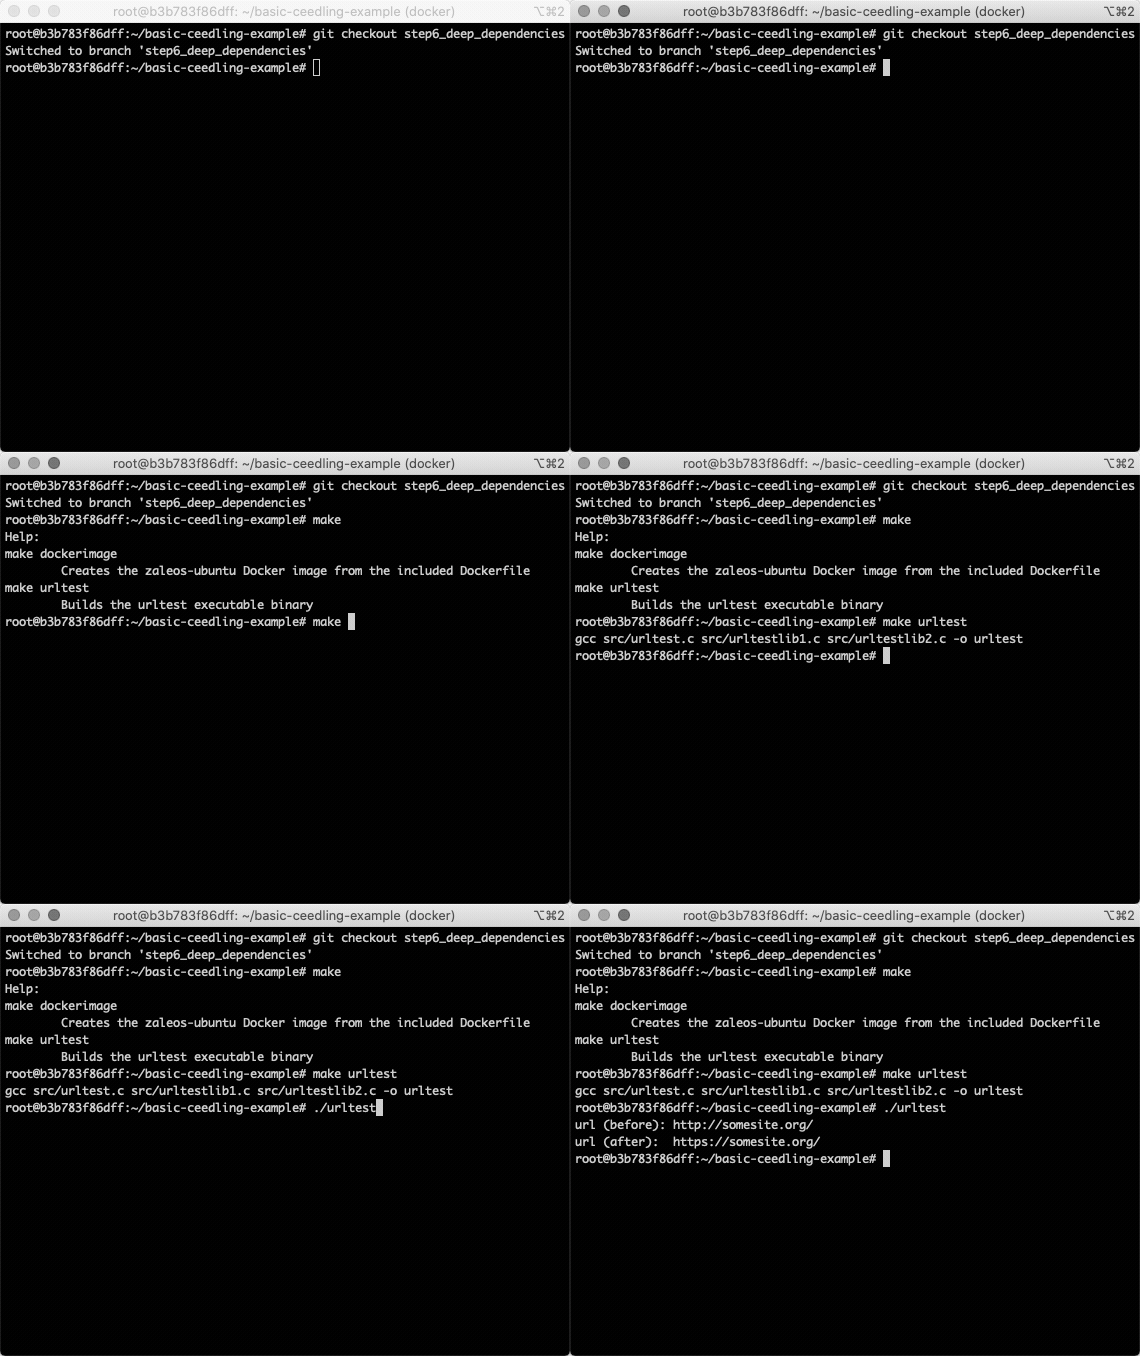
To see the code in action, you can check out the step6_deep_dependencies branch. A Makefile has been included, to build the urltest into an executable binary:
$ git checkout step6_deep_dependencies
More on deep linking, and why it was a pain point for us
When writing our test cases, we started having problems with deep linked header files, because we had to specify all of them inside the test suit. With our codebase, this sometimes meant adding 30+ #include lines to each test suite. This soon became a nightmare to maintain.
What did we do?
To solve this issue, we added a new optional feature to Ceedling, so that it would do a recursive scan of the deeply linked files, so that we wouldn’t need to include them all explicitly. This feature is disabled by default, and it is enabled by configuring the project.yml file. (All you need to do is add :auto_link_deep_dependencies: TRUE under the :project section.)
:project:
	:auto_link_deep_dependencies: TRUE
After applying that change, another issue that we came across was performance. After some analysis, we found a problem with our implementation of auto-linking deep dependencies - we were generating dependency data even for files that had already been analyzed. After adding cache, we managed to reduce the total test suite run time in half.
Auto-deep linking in action
Now let's configure our pet project to use auto deep linking. We need to add this to the project.yml file:
:project:
:auto_link_deep_dependencies: TRUEIn the headers section, we can remove the includes of the aux libraries, because they are going to be automatically pulled in:
// These headers are not needed any more, because of the :auto_link_deep_dependencies switch:
// #include "urltestlib1.h"
// #include "urltestlib2.h"
And now, the unit tests run exactly the same as before, but now, allowing to specify less dependencies explicitly. In our codebase, it has saved us a lot of time.
The code is in the step7_auto_deep_linking branch:
$ git checkout step7_auto_deep_linking
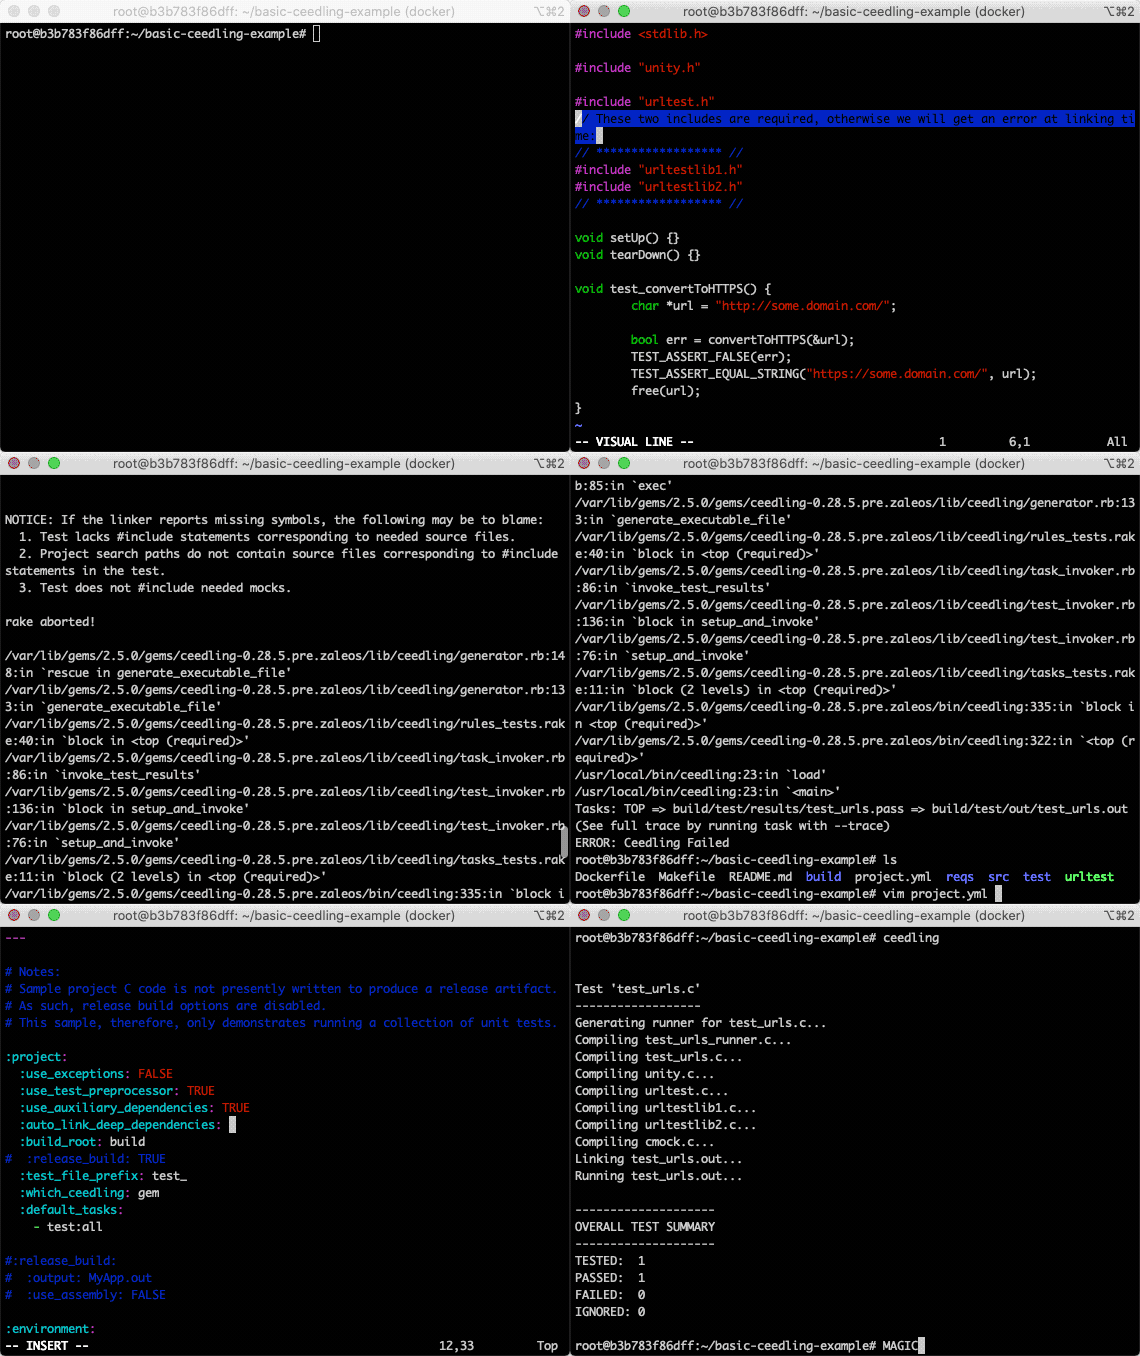
In this basic example, it has only saved us two lines of code, but for larger codebases, it is a different story entirely.
Performance implications
There are some performance implications of using Ceedling instead of Unity on its own:
- If you need to run all of the test suites, Ceedling will be much slower, because each suite is compiled into its own binary, and with Unity, all of the suites are compiled into one single binary.
- However, if you do not need to run all the test suites, only the code you are working on, you can use Ceedling to build/test a single test suite (or multiple ones specified on the command line), which makes the time taken to run the tests a lot shorter. With Unity alone you cannot do this, because it needs to compile all of the tests suites.
Summary
All in all, we think that Ceedling is a great tool, and helps making quality code easier. The only downside is that currently it hasn't got a very large community, so you may have to be prepared to fix and/or implement things on your own.

